
title: After Bed Bug Removal Redbridge: A 10-Point Homeowner Checklist slug: after-bed-bug-removal-redbridge-a-10-point-homeowner meta_title: Bed Bug Removal Redbridge: 10-Point Homeowner Checklist meta_description: After professional bed bug removal in Redbridge, follow this 10-point checklist to prevent reinfestation. Laundry, vacuuming, inspections, and when to call us back. primary_keyword: bed bug removal redbridge tags: bed bug removal redbridge, bed bug aftercare, redbridge pest control, bed bug checklist, post‑treatment guide
After Bed Bug Removal Redbridge: A 10-Point Homeowner Checklist
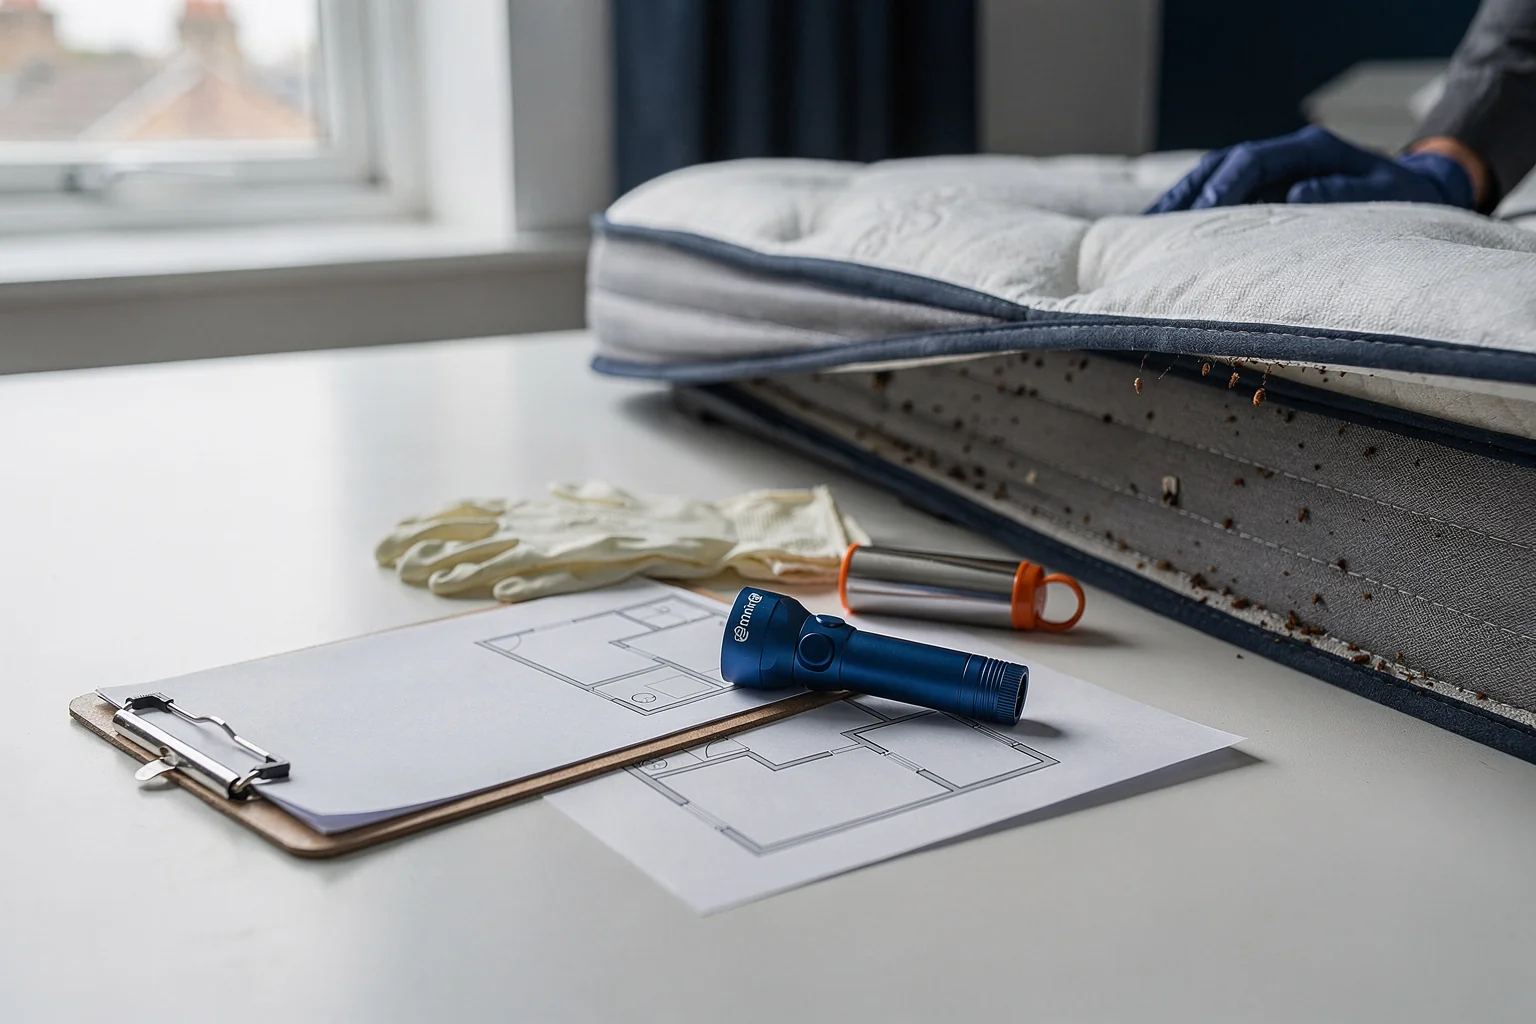
You did the hard part. You noticed the bites, spotted the tiny rust‑coloured stains on your sheets, and called in a professional for bed bug removal in Redbridge. Maybe it was the council’s pest control team, maybe it was our local crew. Either way, the technician has packed up the sprayer, and your home now carries a faint chemical scent. But the job isn’t finished.
What you do over the next fortnight can mean the difference between a one‑and‑done treatment and a miserable repeat outbreak. In Redbridge that matters even more. Our mix of Victorian terraces, inter‑war semis, and modern flats gives bed bugs plenty of deep cracks and voids to hide in, and across the UK the bugs are growing increasingly stubborn. In July 2026, Metro reported that some London boroughs saw a 40% rise in bed bug call‑outs year‑on‑year, and JG Pest Control’s latest data shows heat treatments are up 36% because chemical resistance is spreading. So the quiet discipline you bring to the aftercare directly decides whether the treatment sticks.
This checklist walks you through the 10 most important actions after bed bug removal in Redbridge. It’s built for a busy household — something you can scan in 30 minutes, then weave into your daily routine. No drama, no textbook jargon: just what a technician would tell you while putting the sprayer back in the van.
What the treatment actually accomplished (in plain terms)
Before you start the checklist, it helps to know what the insecticide did — and what it didn’t. Most bed bug removal in Redbridge, including the council’s service, uses a residual liquid spray. The technician applies it along skirting boards, bed frames, mattress seams, and other surfaces where the bugs crawl. The bed bug treatment information published by Redbridge Council explains that the chemical kills most insects on contact and then keeps working for up to two months.
That two‑month residual layer is your safety net. It does not, however, destroy eggs instantly. Live nymphs will continue to hatch for about a week or two after treatment, and those nymphs need to crawl across the treated surface to pick up the insecticide and die. If you scrub the barrier away too early, or if you abandon the sleeping area so the bugs never cross it, you lose that second wave of protection. Understanding that small piece of chemistry changes how you act over the next 10 steps.
Leave the rooms for at least four hours — and check before you re‑enter
Every chemical label is slightly different, but the pre‑treatment preparation advice from the council says you must stay out of sprayed areas for a minimum of four hours. Some technicians may ask you to wait longer, especially if a fog / ULV application was used. Re‑entering too soon risks breathing the mist and also physically transferring wet insecticide off the surfaces — which weakens the barrier before it’s even dry.
What “yes” looks like: you can walk into the bedrooms and see no visible sheen on the floors or furniture. The air smells faintly like a pharmacy but not overwhelmingly so. If you still feel a tickle in your throat or your eyes water slightly, close the door and wait another hour. The residue is harmless once it’s cured, but you want it completely dry before children, pets, or bare skin touch it.
Open every window before you settle back in
Once the four‑hour minimum has passed, push the windows wide for a good 20 minutes, even if it’s chilly outside. This flushes out any lingering airborne droplets and speeds up the drying of the last damp patches. A through‑draught — front door to back window — works best; it moves air across the skirting boards where the heaviest deposit sits.
If you live in a flat off Cranbrook Road or near Ilford town centre, you may only have windows on one aspect. In that case, turn on your bathroom and kitchen extractor fans and use a portable fan to push air towards the open windows. The goal is to avoid a pocket of concentrated vapour building up in a corner where a child’s bed sits. When the air feels fresh and the chemical smell has dropped to a faint background note, you can close the windows and start the next steps.
Point 1: strip and wash everything at 60°C or hotter
This is the single chore that eats most of an afternoon. Every piece of fabric that was in the treated rooms — bed linen, clothing, cushion covers, towels — needs to go through a hot wash. The pre‑treatment preparation advice explicitly says laundered at over 60°C before reuse, and that temperature kills both live bugs and eggs in minutes.
Gather the loads before you start the machine. Use sealed plastic bags to move items from the bedroom to the laundry area; otherwise you risk dropping a stray bug or egg in the hallway. Run the wash on its hottest cotton cycle, then tumble dry on high for at least 30 minutes. Items that cannot take 60°C — dry‑clean‑only curtains, silk, some synthetics — can be frozen. Seal them in a plastic bag and place them in a chest freezer for a minimum of four days, or outside if a deep freeze is due. Keep notes: a quick list on your phone reminds you which duvet cover is still waiting.
Point 2: resist the vacuum — really
Your instinct will scream at you to vacuum the bedrooms. Don’t. The white powder you might see on the skirting boards is part of the residual insecticide; a single pass with a vacuum cleaner will pull it straight off. The council’s treatment information notes that the insecticide can work for up to two months, so the general rule is to avoid vacuuming, mopping, or wiping treated surfaces for at least four weeks unless your technician gave you a different date.
One exception: if you spot a cluster of dead bugs on an untreated area — say on the middle of the floor — you can use a handheld vacuum on that specific spot, then immediately seal and bin the bag or empty the canister outdoors. Never run a beater‑bar vacuum over carpet edges or bed frames, because the bristles scrub away the deposit. When you do eventually resume cleaning, start with a gentle dry‑dust cloth along the skirtings; if you need to mop, keep water far away from the treated perimeter.
Point 3: don’t move beds, drawers, or suitcases between rooms
Bed bugs are champion hitchhikers. After treatment, a handful of surviving eggs or slow‑moving nymphs may be hiding in the crack of a wooden bed leg or inside an old cardboard box. If you decide to finally re‑organise the spare room on day three, those stowaways can travel with the furniture and colonise a room that never had a problem. For at least two weeks — and ideally the full month — leave every piece of furniture exactly where it was during the spraying.
The same rule applies to anything you pulled out before treatment. If you stuffed clothing into black bags and stored them in the bathroom, don’t bring those bags back into the bedroom until every item inside has been laundered or heat‑treated. Treat each bag as a potential egg carrier. It’s tedious, but it closes the loop.
Point 4: keep sleeping in your treated bed
I know this feels counter‑intuitive. Nobody wants to lie down where they recently found bugs. But bed bugs are drawn to CO2, warmth, and movement — you are the bait. If you decamp to the sofa, the bugs still hiding in the bedroom will simply bide their time, and eventually sense your absence and crawl out to find you in the living room. A few days of that and you’ve spread the issue to a second area.
So make the bed with the freshly laundered sheets, flick on a bedside lamp, and act normally. The bugs that hatch over the next week need to walk across the treated surface to reach you. Most will die within hours. By staying put, you concentrate the problem in one location and give the chemical the best shot at finishing the job. If the thought still bothers you, a mattress encasement (Point 7) gives an extra physical barrier without sabotaging the strategy.
Point 5: start a weekly inspection routine on day three
Mark it on your calendar. Every Saturday morning, for example, spend 15 minutes checking the seams of your mattress, the corners of the bed frame, the back of the headboard, and the skirting boards. Take a torch and a plastic card — an old loyalty card works fine — to gently run along crevices; this will scrape out any tiny white eggs or translucent nymphs that a glance would miss.
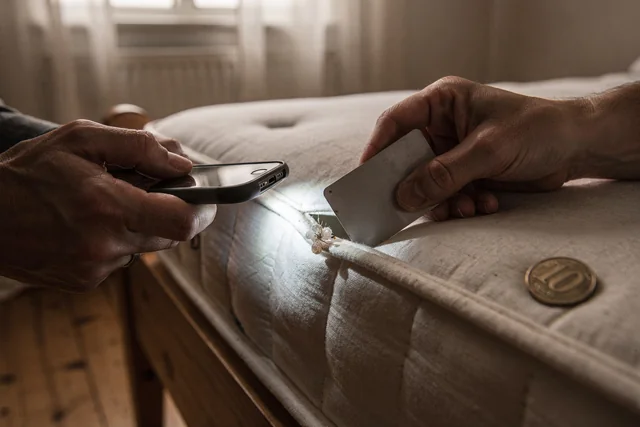
You’ll need to know what a live bed bug looks like at each life stage. Our bed bug identification checklist walks you through adult, nymph, and egg sizes and colours. Print it out or keep it on your phone so you’re not guessing. What “yes” looks like here is a clean card and no movement. A solitary dead bug on the floor is fine; a live bug scuttling up the wall warrants a note.
Write down every finding, no matter how small. Date it. A diary like “17/7 — one dead adult under window board” tells your technician far more than a panicked phone call that says “I think they’re back.” If you’re in a flat in Redbridge, remember that bugs can slip through party walls; mention any new sightings to your neighbours so the whole block doesn’t leapfrog.
Point 6: learn to read your skin without jumping to conclusions
Bite anxiety is real, and after bed bug removal Redbridge households often interpret every summer bug bite as a sign of failure. Give yourself a calmer framework. Write down when you first notice a new mark, take a photo with a coin for scale, and describe the sensation — itchy, raised, blistering, flat.
Then rule out the usual look‑alikes. Mosquito bites, flea bites, and even heat rash can mimic bed bug welts. Our guide on bedbug bites vs mosquito bites breaks down the timing and pattern differences that save you from needless stress. In the first week after treatment, a few fresh bites don’t automatically mean the treatment failed. Remember that eggs are still hatching, and the nymphs that find you will have to crawl over the insecticide. You might get a small batch of bites on days four to six; if they stop after that, the barrier is working.
What needs attention is a pattern that grows rather than shrinks. Five new bites on Monday, ten on Wednesday, fifteen on Friday? That’s a signal to move to the follow‑up plan.
Point 7: seal up the mattress and box spring
A good encasement — one labelled “bed bug proof,” with a fine‑tooth zipper and no seams — acts as a physical cutoff. Any bugs still living inside the mattress or box spring after treatment simply starve inside the cover over several months. And because the outer surface is smooth and seam‑free, new bugs from the room have fewer hiding spots. Fit the encasement on the day you resume sleeping in the treated bed.
What “yes” looks like: the cover lies flat with no rips, the zipper is at the head end and fully closed, and you’ve placed a small piece of masking tape over the zipper pull (so nobody unzips it accidentally). Many encasements claim a 10‑year life; check the manufacturers’ label. If you ever see a stain appear on the outside of the cover, treat it as a fresh sign and run the inspection routine again.
Point 8: schedule the follow‑up call before you think you need it
Most chemical treatments for bed bugs need a second visit about two to three weeks after the first. The technician will reassess, spot‑treat any overlooked cracks, and lay a fresh residual barrier if necessary. The Redbridge Council pest control service lists a per‑room charge and, on their pest control service page, you’ll see that additional rooms or a larger‑than‑standard job may affect the total fee. Knowing that upfront helps you budget.
If you used a private company, ring them at the two‑week mark anyway and report your inspection diary. A good provider will send someone out for a quick check at no extra call‑out charge. And if you’re worried about picking the right one second time around, our how to choose a bed bug service fast page runs through the questions that sort a reliable outfit from a sticker‑merchant.
Point 9: strip the rooms of clutter — slowly
Don’t dump everything on day one; you’ll stir up bugs. But over the following weeks, methodically reduce the stuff that gives bed bugs cover. Clothes you haven’t worn in a year. Stacks of magazines beside the bed. Cardboard boxes holding old charger cables. Each of these items is a potential refuge.
Work one corner at a time. Bag items in clear plastic, label them with the date, and leave the sealed bag in the treated room for at least a month. That way any bugs inside starve or walk out across the insecticide. After 30 days, you can move the bag to a shed or a loft, but don’t unpack it into a clean room without laundering or freezing the contents. Decluttering isn’t a quick fix, but it’s one of the few steps that permanently lowers the risk of a repeat episode.
Point 10: put a permanent prevention plan in place for your Redbridge home
Once you’ve beaten the current infestation, a few small habits keep it from happening again. When you return from a holiday or a business trip, unpack directly into the washing machine and inspect the luggage zipper seams. Our advice on preventing bed bugs in your car covers how bugs can travel in a car boot — a vulnerability many people forget.
Before buying second‑hand furniture on Gumtree or Facebook Marketplace, examine the joints with a torch and a magnifying app on your phone. If you’re a landlord in IG1, IG2, or IG4, make sure your tenancy agreements spell out the steps tenants must take after a council or private treatment; early detection in flats is so much cheaper than a whole‑block outbreak. A quick re‑read of our early bed bug detection in flats guide can prime you (and your neighbours) to react before the bugs spread.
You’ve now got a clear, step‑by‑step map for the weeks after bed bug removal in Redbridge. Worked through the list and you’re still uncovering live adult bugs past day 14? That’s a signal the population may be resistant, or a second treatment was always going to be necessary. Either way, don’t wait. Get started with a same‑day inspection — we cover the IG1, IG2, IG4 and wider Redbridge postcodes with no call‑out charge.
Need professional help? BuzzKill offers fast, reliable pest control services across London and Essex.