
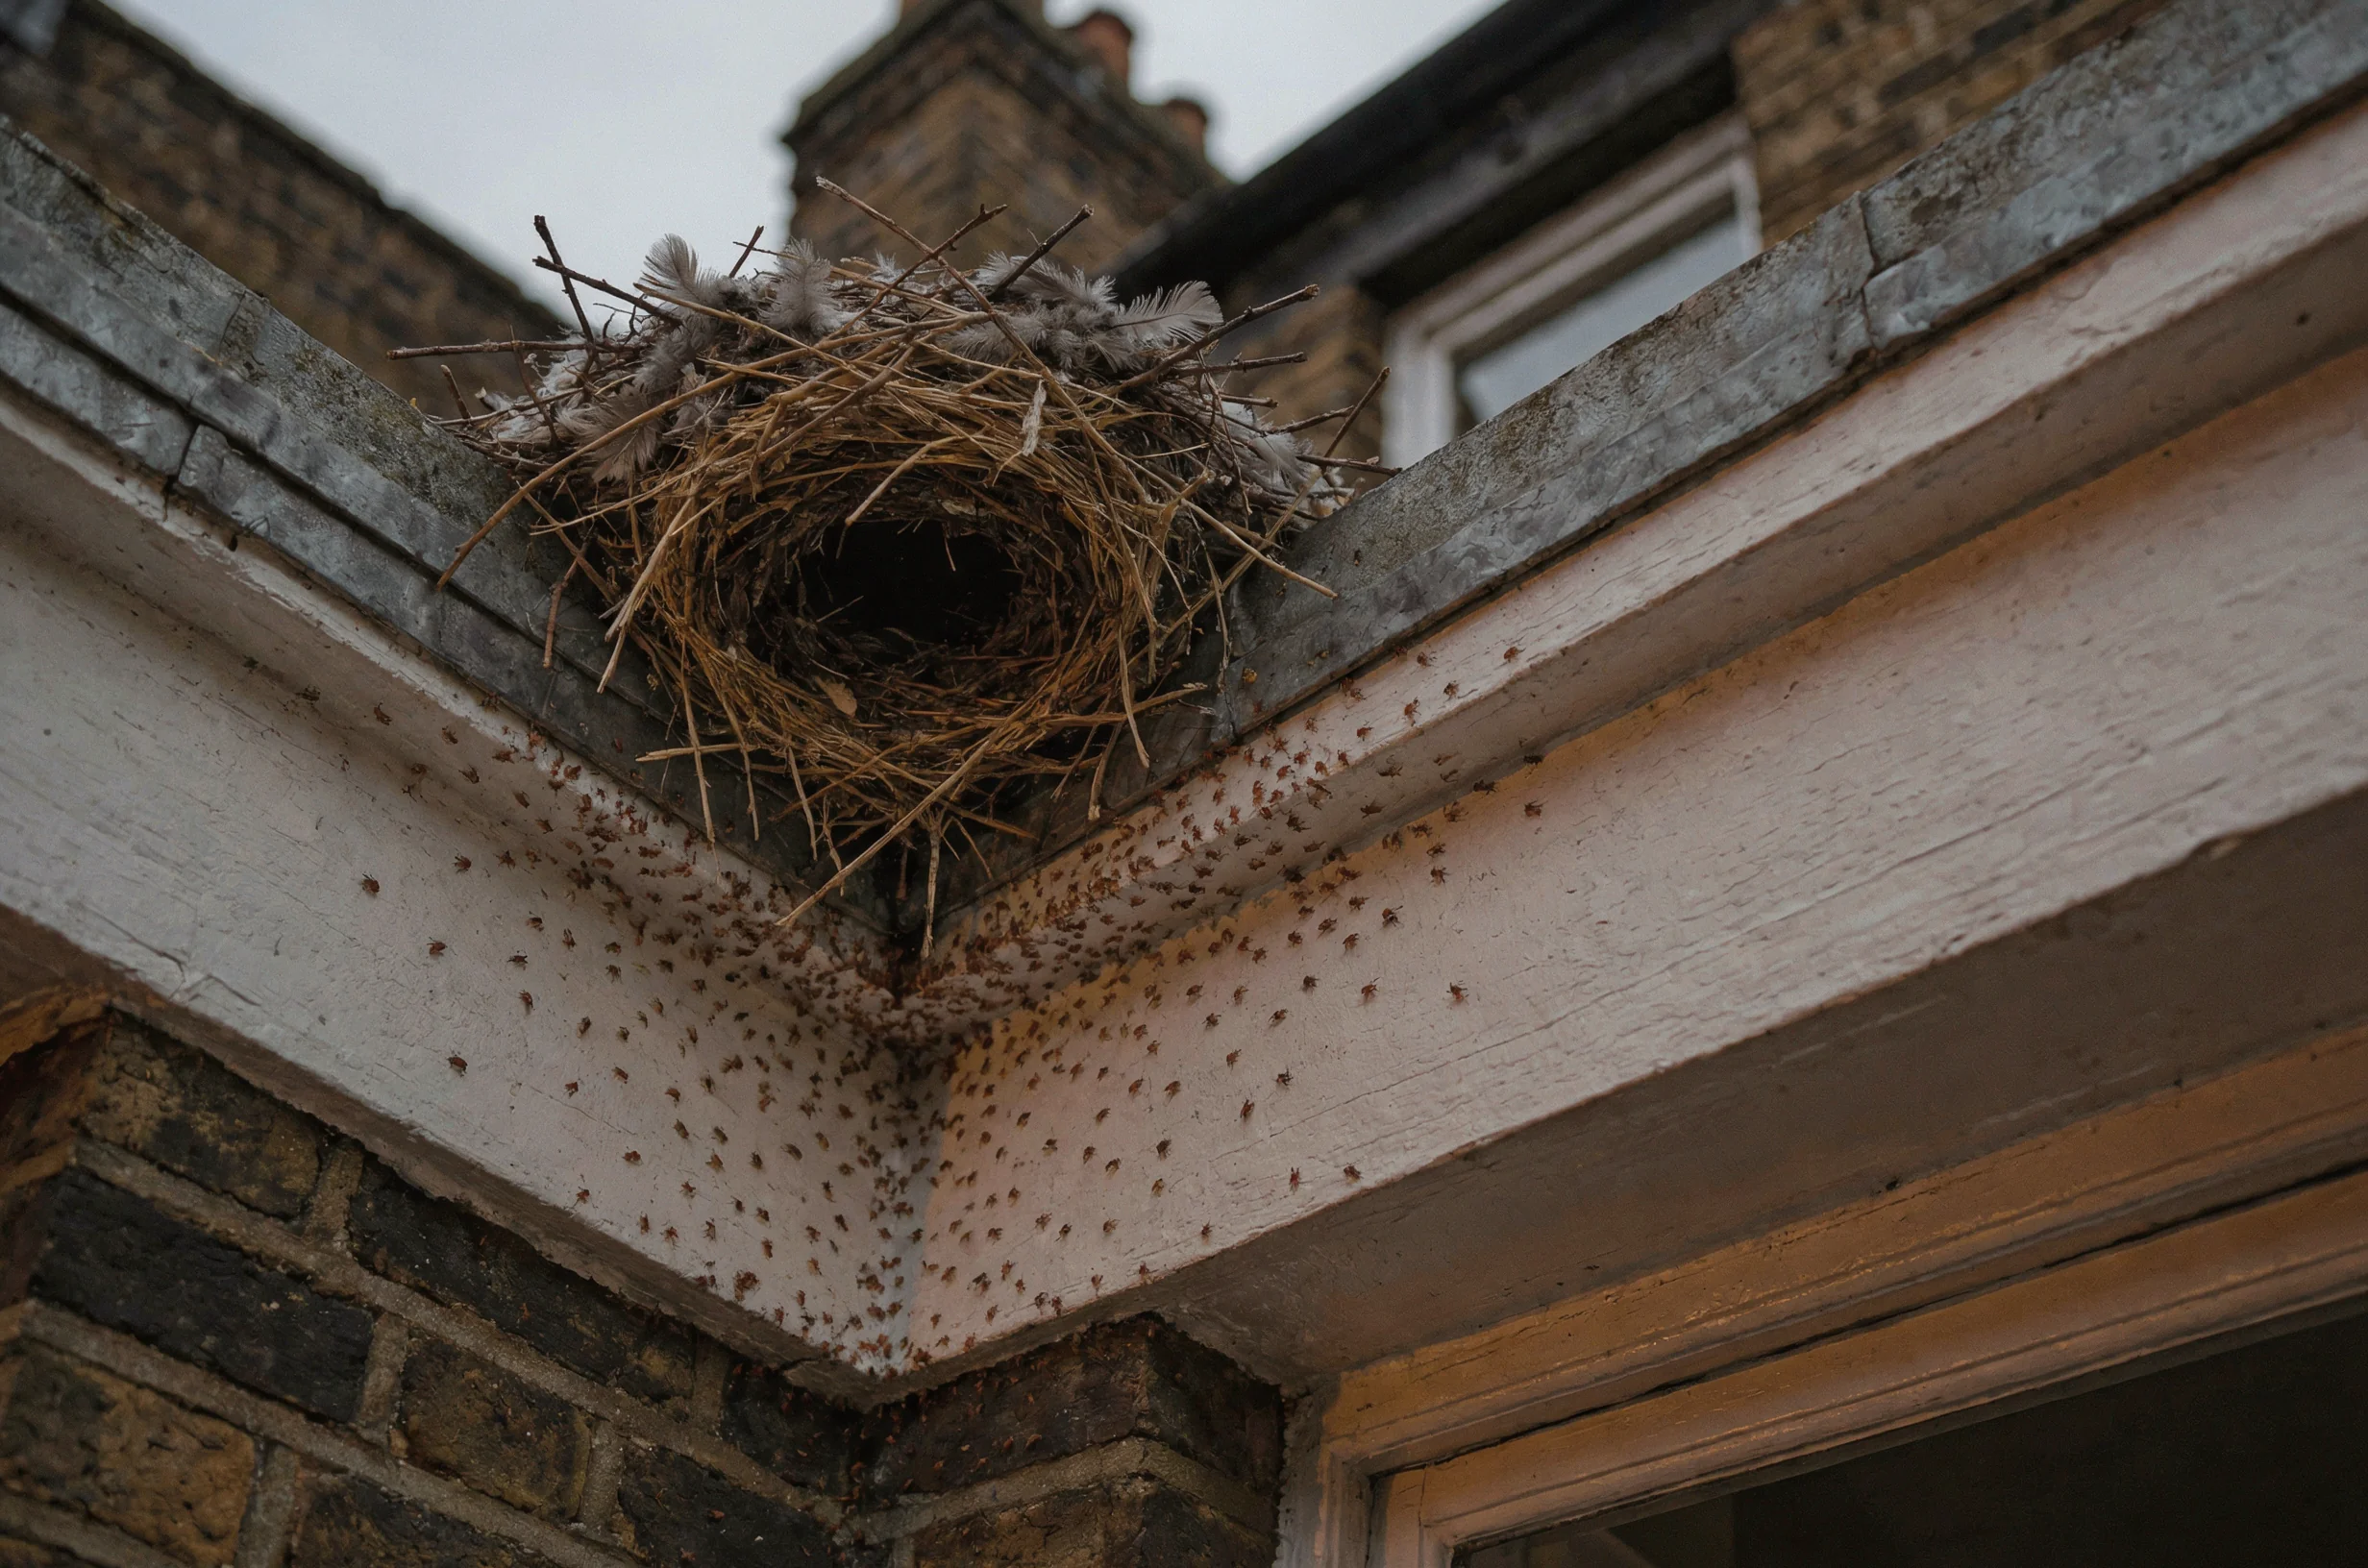
Finding bird mites indoors after pigeon nest removal can be unsettling, especially when tiny moving specks appear beside a bedroom window. Start by collecting a sample, recording where you found it and checking the old nest position from somewhere safe. Avoid disturbing remaining nest debris or spraying the whole room. The order matters: identify the pest, address the bird source, then clean and treat the places mites have reached. I'd begin with the window or ceiling nearest the nest, rather than assuming every room needs treatment.
Use the first half-hour to contain and record sightings
Your first job is to keep useful evidence and limit unnecessary movement between the nest area and your living space. You don't need to empty the bedroom immediately.
Work through these actions in order:
- Photograph the moving specks before wiping them away. Take a wider photograph showing the window, wall or furniture where they appeared.
- Collect a specimen from a hard surface if you can. Keep it in a small sealed container and label it with the room and date.
- Close the affected window temporarily if practical, while maintaining necessary ventilation through another suitable opening.
- Leave curtains, cushions and bedding in the affected room until you can bag them for washing. Avoid shaking them through the hallway.
- Note when the nest was removed, who removed it and whether any material remains outside.
Keep children and pets away from nest debris and any cleaning or treatment area. If you've already applied a product, retain its packaging and record where you used it.
Don't climb onto a window ledge or lean outside to inspect the nest site. A photograph from ground level or another safe viewpoint is enough for an initial record.
If there are bites but no visible pests, keep that distinction in your notes. Skin marks alone cannot confirm that bird mites are responsible.
Check the specks before treating for mites
The connection between a pigeon nest and indoor sightings is useful evidence, but it doesn't identify every small creature near the window. Treatment should follow identification wherever possible.
Keep a specimen that someone can examine
Bird mites are very small, so a phone photograph may show movement without enough detail for identification. Photographing a specimen against a plain background can help, but avoid relying on colour alone.
Ask whoever will identify the pest how they would like the sample collected. Transparent tape can help lift a specimen from a surface, although it may obscure details. A sealed container may be preferable.
Record whether you found it on the sill, curtain, bed frame or another surface. That location can help connect the specimen to an entry route.
If BuzzKill Pest Control is carrying out the inspection, keep the sample and location notes available for the technician. Include photographs taken before cleaning.
Separate pest evidence from skin symptoms
Other pests and skin conditions can cause similar complaints. A nest removal date is a clue; it doesn't prove the cause of every itchy mark.
Look for a pattern you can document:
- Moving specks repeatedly appearing around the window nearest the nest.
- Sightings beginning after birds left or nest material was disturbed.
- Activity around a ceiling edge, loft hatch or opening connected to the nesting area.
- Fresh sightings in the same place after surface cleaning.
If you cannot find specimens, avoid repeatedly applying different insecticides. Continue recording actual sightings separately from itching.
A pharmacist or GP can advise about persistent itching, sore skin or a rash. Give them the history without presenting an unconfirmed pest identification as a diagnosis.
Follow the trail back to the old nest
Mites associated with birds may leave a nest when their bird hosts disappear or the material is disturbed. Removing the visible nest can leave surrounding debris and sheltered gaps worth inspecting.
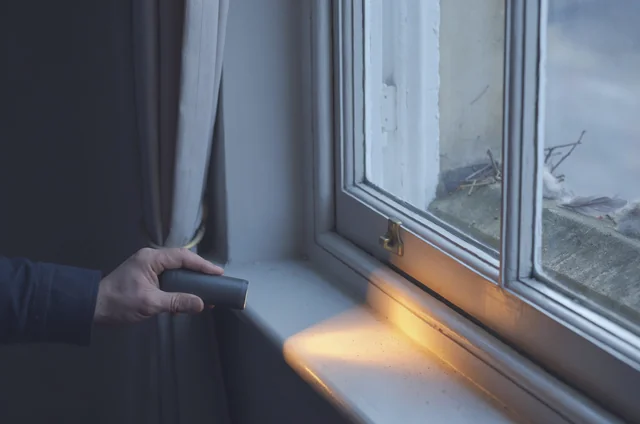
Start with the nearest window and wall
Inspect indoors first, using a torch. Follow the frame edges, corners of the sill, curtain fittings and the junction between the wall and ceiling.
Look for gaps in damaged seals or unfinished joints. Record them rather than immediately filling every opening. Some slots provide drainage or ventilation and need to remain functional.
Check behind nearby furniture without dragging it into another room. If sightings are concentrated beside one window, keep your inspection focused there before expanding across the property.
Outside, identify the nest's original position. Was it directly above the window, behind a pipe, under an eave or beside a balcony? Ask whether the removal included loose material around the nest.
Don't assume a clean-looking sill means the space behind a fascia or ledge is clear. Photograph anything that cannot be inspected safely.
Include lofts and shared building spaces
If the nest was near the roof, note sightings around the loft hatch and upper ceiling edges. Avoid entering an unfamiliar loft with uncertain footing, poor lighting or bird debris.
A nest in a roof space needs an assessment of access and the surrounding material. Keep domestic cleaning equipment away from droppings and nest waste.
In a London flat, the source may sit on a communal ledge or beside another flat's window. Tell the landlord or managing agent where it is and ask who can arrange access.
Our guide to pigeon responsibility in leaseholds can help you prepare those questions. Keep photographs, removal dates and contractor details together so the building manager can assess the external source.
Clear the nest source without spreading dust
Remaining nest material deserves attention before repeated room treatments. Indoor cleaning can remove visible mites, but an unresolved source can keep the problem going.
Confirm the nesting area is ready for work
If birds, eggs or chicks may still be present, stop before moving material or blocking access. Have the species, nest status and permitted work checked first.
An apparently quiet nest isn't enough to settle those questions. Observe from a distance and pass the details to someone qualified to assess it.
For an already removed nest, find out exactly what was cleared. Ask whether material remains behind the ledge, beneath nearby fittings or inside an accessible cavity.
The guide to safe bird nest removal covers decisions to make before disturbing a nesting site. Arrange specialist access when reaching the source would require roof work, ladders or leaning beyond a window.
Keep nest waste separate from room cleaning
Don't dry-brush droppings or use a domestic vacuum on pigeon nest material. Those tasks can release dust and spread debris.
Deposits of droppings, overhead work and enclosed roof spaces need an assessment of suitable equipment and protective measures. Gloves alone don't make every clean-up suitable for DIY.
For a small, safely accessible clear-up that has been assessed as suitable, contain loose material at the source. Avoid shaking it into open air or carrying it uncovered through the home.
Bag waste securely before moving it and follow the disposal arrangements appropriate to the job. Keep waste bags away from children and pets.
The pigeon droppings health risks guide explains why the handling method matters. If debris has entered insulation or a cavity, record its location and leave that part for assessment rather than pulling materials apart.
Work through windows, floors and bedding in order
Once the source has been addressed, clean the affected room methodically. Start near the suspected entry point and work towards the rest of the room.
Clean ordinary room surfaces first
Use this sequence for household dust and visible specks where there are no droppings or nest deposits:
- Clear small items from the sill into a container that stays in the room.
- Vacuum accessible frame edges, skirting boards and floor edges with a suitable attachment.
- Clean washable hard surfaces with a damp cloth and an appropriate household cleaning product.
- Check behind the nearest furniture and around curtain fittings.
- Deal with vacuum waste according to the manufacturer's instructions, sealing collected waste before disposal.
If you uncover nest fragments or droppings, pause. Switch from ordinary room cleaning to an assessment of the bird waste.
Don't spray insecticide into the vacuum or mix cleaning products. Keep cleaning materials away from food, toys and pet bowls.
Where a technician has already applied treatment, follow their cleaning instructions. Washing or vacuuming a treated area too soon may interfere with the planned treatment.
Bag fabrics before carrying them to the wash
Place affected bedding and washable curtains into bags before taking them through the property. Empty them directly into the washing machine without shaking them.
Wash and dry items using the hottest settings their care labels allow. Check delicate curtains, mattress covers and upholstered items separately; one setting won't suit everything.
Keep washed items separate from items awaiting cleaning. A clean, closed container can help while work continues around the window.
Vacuum accessible bed-frame joints and nearby floor edges if these are part of the affected area. Avoid soaking a mattress or using unlabelled mixtures on upholstery.
There's usually no reason to discard furniture solely because bites followed nest removal. Keep the decision tied to identified pests, the condition of the item and the treatment advice.
After cleaning, note which surfaces and fabrics you've dealt with. That record makes a fresh sighting easier to distinguish from an area that hasn't yet been checked.
Match any treatment to the pest and the surface
Bird-mite treatment needs a confirmed target and a clear location. A product suitable for one household pest or surface may be unsuitable for another.
Read the permitted use before opening a product
Check the label for the pest, application area, surface restrictions and instructions covering people and animals. If it doesn't clearly cover your intended use, get advice before applying it.
Follow the stated amount and interval. Extra applications are not a reliable substitute for finding the remaining source.
Never use a room or surface insecticide on skin, clothing or animals. Keep products away from food preparation areas and follow the instructions for ventilation and re-entry.
Avoid combining treatments or applying a second product over an unknown first treatment. Give a technician the names of anything already used, including powders and aerosols.
General room spraying can miss sheltered areas around the original nest route. Don't use a fogger as a substitute for inspecting those gaps.
Stop DIY when access or evidence is unresolved
Professional assessment is appropriate when the nest site is inaccessible, substantial bird waste remains or sightings continue despite source removal and careful cleaning.
It is also useful when several flats are affected or no one can establish where birds were nesting. Separate treatments inside individual rooms may leave the shared source untouched.
For treatment arranged through BuzzKill Pest Control, ask for written instructions about preparation, treated areas, re-entry and follow-up cleaning. Explain whether anyone has particular concerns about children, pets or product exposure.
Ask what evidence would trigger another inspection. The answer should relate to identified mites, repeat locations and the source area.
If the identification remains uncertain, retain new specimens before any further treatment. A clear sample is more useful than another unrecorded spray application.
Check progress and prevent another nest
After the first clean-up, use repeat observations to judge progress. The next 48 hours are a useful checking period, not a promised clearance deadline.
Compare the same places today and tomorrow
Recheck the original sill, nearby frame edges and any other recorded sighting points. Use similar lighting and photograph fresh activity before cleaning it away.
Record the room, surface and whether you found a moving specimen. Keep skin symptoms in a separate part of the record.
An interactive room checklist could store dated sightings, photographs and completed cleaning tasks, with a reminder to revisit the original entry point.
If activity remains concentrated around one opening, revisit the external source and the connection to that room. More room treatment may be premature.
Where treatment has been applied, use the technician's stated review interval. Report fresh evidence promptly without changing the treatment schedule yourself.
Fit proofing after the area has been checked
Pigeon proofing aims to prevent birds returning to the cleared nesting position. The design needs to suit the ledge, roof detail or opening involved.
Before anything is fitted, check that birds won't be trapped behind it. Confirm that ventilation, drainage and maintenance access will remain usable.
Spikes, mesh and netting suit different building details. An unsuitable arrangement can leave a sheltered space available beside or behind the installation.
For a window-ledged nest, the pigeon proofing costs guide can help you frame questions about access and coverage. Get the proposed area of work described clearly before agreeing to it.
Continue checking the original location and adjacent ledges after proofing. Use a monthly pigeon nest check to spot new material from a safe viewpoint.
Photograph damaged or displaced proofing and arrange an inspection rather than reaching out to adjust it yourself.
Answers for an itchy bedroom after nest removal
The remaining uncertainty is often about how long the problem will last and whether everyday belongings are safe to keep. Use confirmed evidence to guide those decisions.
How long will mites keep appearing?
There isn't a dependable countdown based only on the nest removal date. Identification, remaining nest material, hidden access routes and treatment all affect the assessment.
Ask the technician what improvement to expect and when they want an update. Keep dated specimens or photographs of continuing activity.
If sightings persist around the original entry point, check that the source was fully addressed. Avoid assuming that waiting alone will resolve an overlooked nest or debris pocket.
Do I need to throw away the mattress?
Bites alone don't justify throwing away a mattress. First establish whether mites are present and whether the mattress is actually involved.
Keep bedding bagged before washing and inspect the bed frame and surrounding floor. Follow the care label for the mattress cover.
If treatment is proposed, ask specifically whether it is suitable for that mattress and how it can be used afterwards. Don't apply a general household spray to a sleeping surface without clear permitted-use instructions.
Can I use mite spray on the bites?
A household pest spray is not a skin treatment. Don't apply it to bites or use veterinary mite products on yourself.
Speak to a pharmacist or GP about persistent itching, broken skin or a worsening rash. Explain that a bird nest was nearby and whether a specimen has been identified.
Keep pest-control products in their original packaging so the contents and instructions remain available if advice is needed.
What if itching continues but I can't find mites?
Continuing itching doesn't establish continuing mite activity. Keep looking for physical evidence without treating every sensation as a new sighting.
Record when and where symptoms occur, alongside a separate log of specimens. Share the skin symptoms with a healthcare professional and the pest evidence with the person identifying the pest.
If repeated checks produce no specimens, ask for the diagnosis to be reviewed before adding more pesticides. Retain photographs of any fresh visible pest.
Why have the mites appeared again after cleaning?
A fresh sighting could reflect an overlooked gap, remaining nest debris, another nesting site or an incorrect initial identification. Cleaning records help narrow those possibilities.
Check whether the new activity is in the original corner or somewhere different. Note any recent bird activity outside.
If proofing is already fitted, photograph its condition from a safe position. Reinspect the original nest location and neighbouring ledges before adding further treatment.
Need professional help? BuzzKill offers fast, reliable pest control services across London and Essex.