
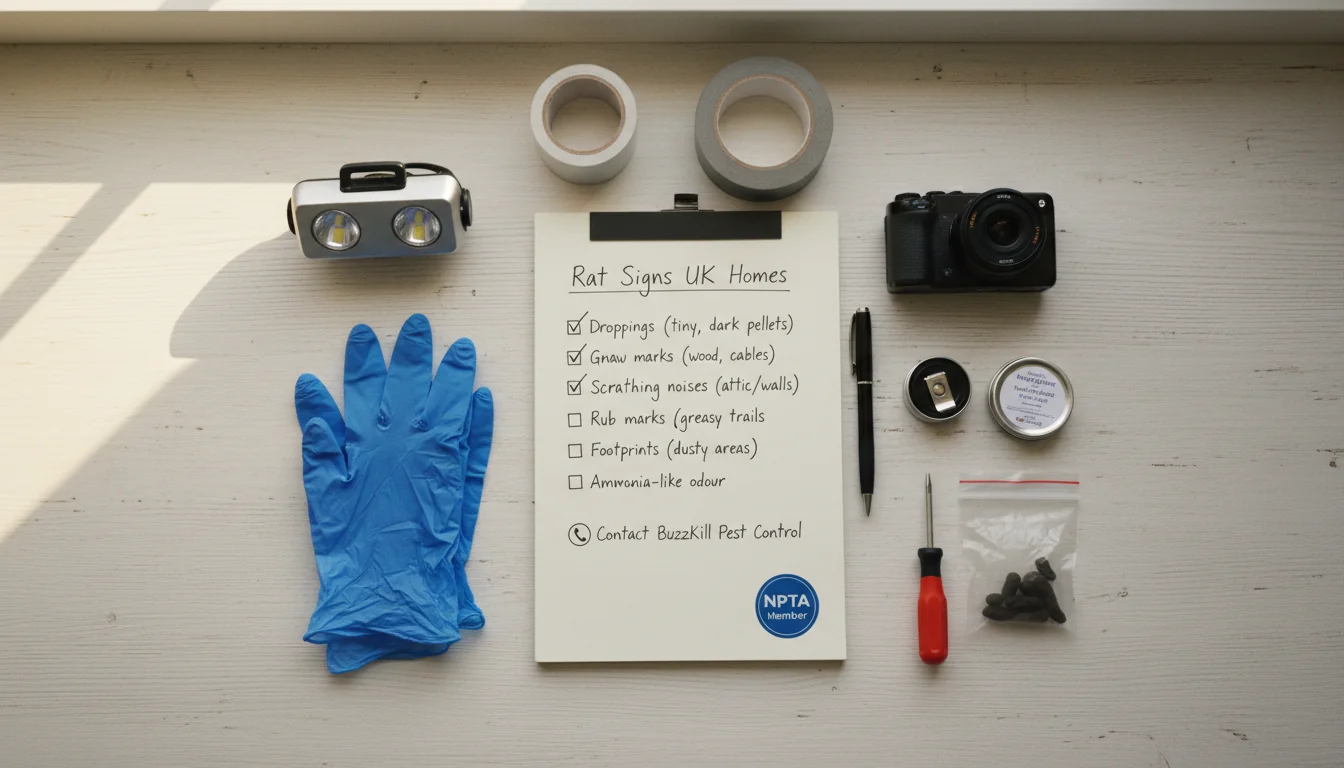
A comprehensive room-by-room checklist for identifying evidence of rats in your home before it escalates.
This guide is for any UK homeowner or tenant who suspects they might have unwelcome visitors but isn't sure what to look for. It’s designed to be used systematically, giving you a clear yes-or-no answer about whether you have a rat problem. Set aside around 60 to 90 minutes to complete this inspection thoroughly; doing it right the first time is key.
Key Takeaways
- Subtle Clues Matter: Rats often leave behind faint grease marks on walls, barely audible sounds at night, and other small clues long before you ever see one.
- Systematic is Best: A methodical, room-by-room check is far more effective than a random search. It ensures you don't miss hidden hotspots like utility cupboards or loft corners.
- Connect the Dots: Finding evidence in multiple areas, such as droppings in the kitchen and a nest in the loft, strongly suggests an established and active problem requiring immediate attention.
- Entry Points are Critical: Identifying how rats are getting in is just as important as confirming their presence. A professional treatment will always include proofing these access points.
- Early Detection Saves Stress: Spotting the first rat infestation signs saves you significant time, money, and the emotional distress that comes with a larger-scale issue.
Before You Start
A proper inspection requires a few basic tools and a bit of preparation. Taking a few minutes to get organised will make the process safer and more effective.
- Gather Your Tools: You will need a powerful torch (phone torches often aren't bright enough), disposable gloves, and it's a good idea to wear old clothes. For hard-to-see areas like behind appliances, a small mirror on a stick can be very helpful.
- Choose the Right Time: The best time to listen for activity is at night when the house is quiet and rats are most active. However, the best time to conduct your visual inspection is during the day when you have maximum natural light.
- Prioritise Safety: When inspecting lofts or cellars, be mindful of your footing and watch out for electrical wiring or pipework. Never touch potential droppings or nesting material with your bare hands.
Phase Snapshot
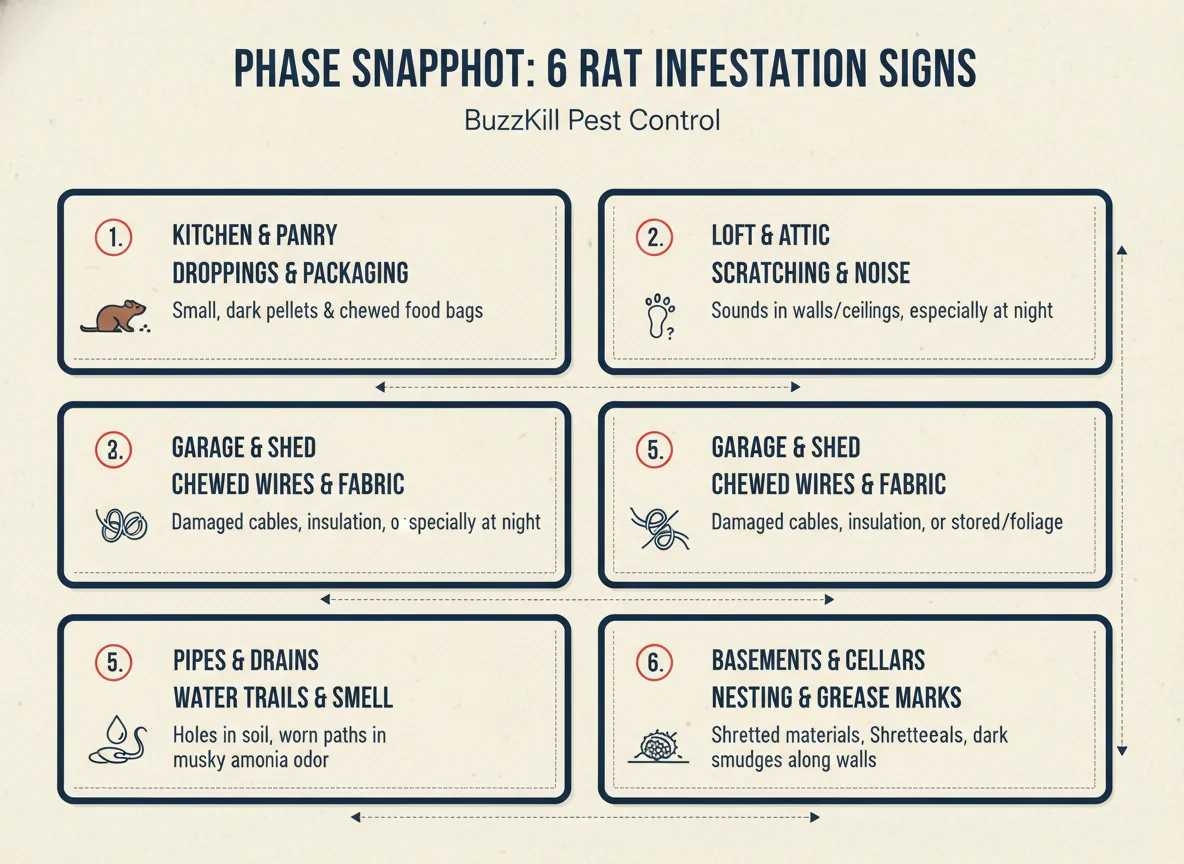
This checklist is broken down into six distinct phases. Each one focuses on a different area of your property, building a complete picture of any potential activity.
| Phase | Goal | Time Needed | Done Looks Like |
|---|---|---|---|
| 1. The Exterior Inspection | Identify outdoor attractants and entry points. | 20 mins | All potential access points and external risks are noted. |
| 2. Kitchen & Utility Room Check | Find evidence near food and water sources. | 15 mins | All cupboards and appliances are checked for droppings and damage. |
| 3. Loft & Attic Inspection | Uncover hidden nests and concentrated activity. | 15 mins | The loft has been safely checked for nests, sounds, and waste. |
| 4. Living Areas & Bedrooms | Spot signs of a more widespread problem. | 10 mins | Skirting boards and furniture checked for gnaw marks or smells. |
| 5. Basements & Wall Cavities | Listen for activity within the structure. | 10 mins | Foundations checked for burrows; walls checked for sounds. |
| 6. Compiling Evidence & Assessing Risk | Evaluate the scale and urgency of the issue. | 10 mins | All findings are mapped out to determine the next steps. |
Phase 1: The Exterior Inspection
Nearly all rat problems begin outside the home. Rats are drawn to properties that offer food, water, and shelter, and they are experts at exploiting tiny weaknesses to gain entry. This phase is about seeing your property from a rat's perspective. A thorough external check is the first and most critical step.
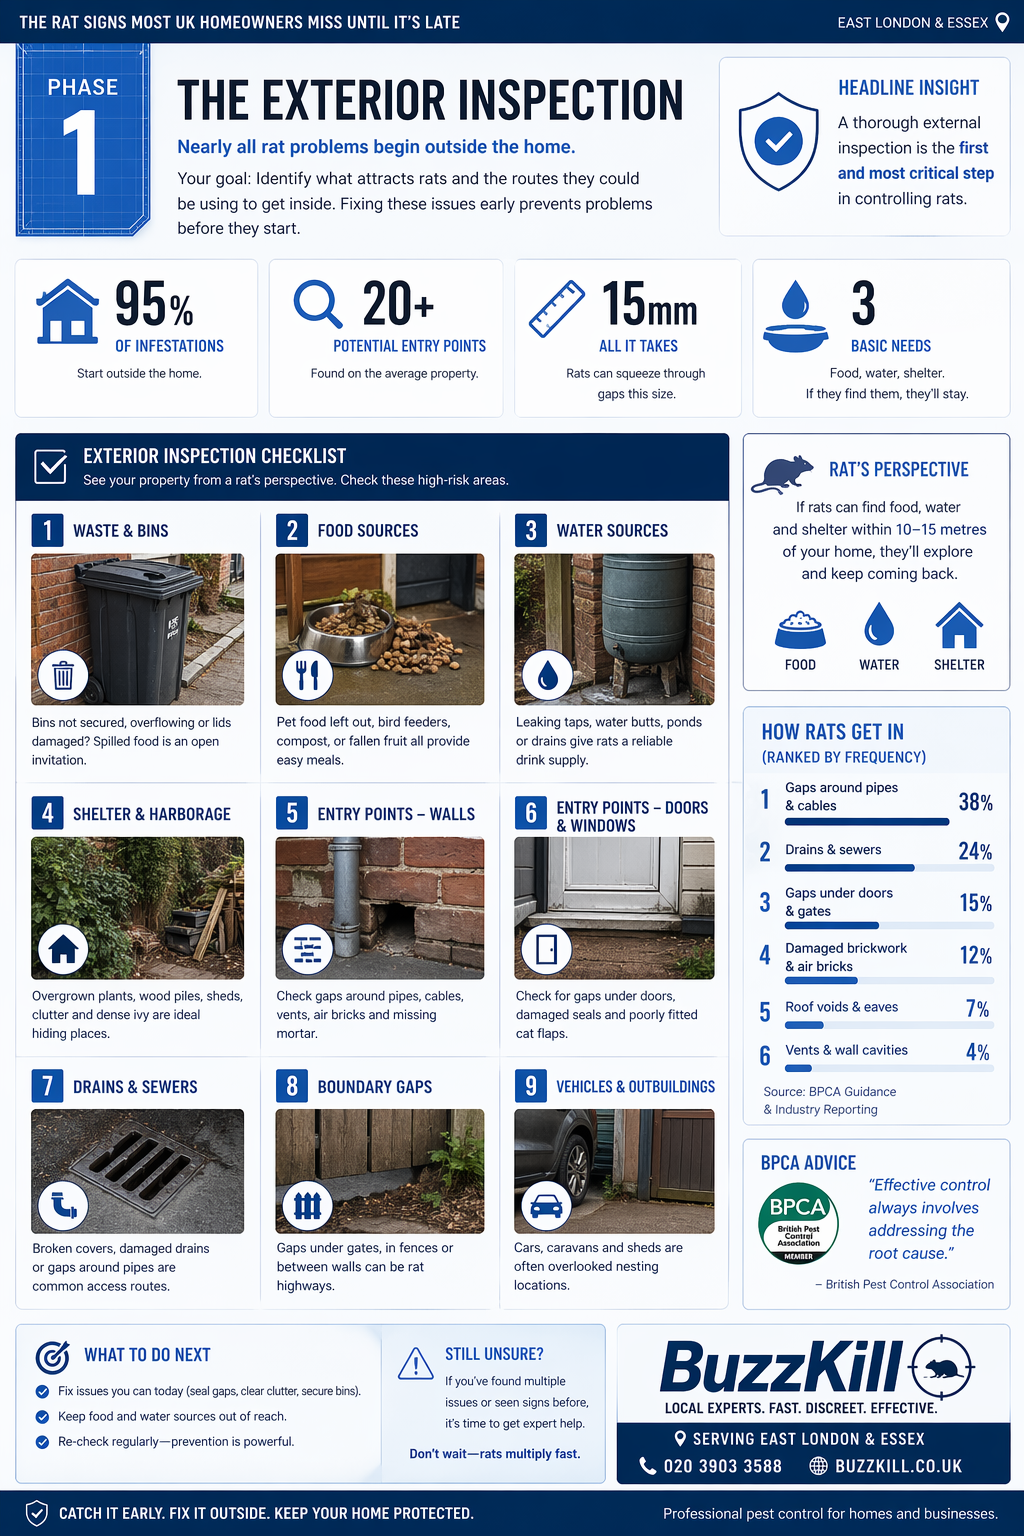
Your goal here is to identify anything that might attract rats to your home and, crucially, find the routes they could be using to get inside. Even if you find no signs indoors, securing these external vulnerabilities is a powerful preventative measure. Remember the advice from the British Pest Control Association (BPCA): effective control always involves addressing the root cause, which often lies outdoors.
- ☐ Inspect Bins and Compost Heaps: Check your wheelie bins, recycling boxes, and any compost areas. Look for gnawed holes in plastic bins, spilled waste, or signs of burrowing underneath a compost heap. These are major food sources that can sustain a local rat population.
- ☐ Check Drains and Sewer Grates: Brown rats are adept swimmers and often travel through sewer systems. Ensure drain covers are intact and secure. A damaged or dislodged drain cover is a common entry point, providing direct access to your property's foundations.
- ☐ Scan for Entry Points in the Building Fabric: Carefully walk the perimeter of your house and look for any gaps. Pay close attention to air bricks, gaps around pipework, and the space under eaves. A young rat can squeeze through a hole the width of a pencil, so no gap is too small to ignore.
Done means: You have identified and made a note of all potential outdoor food sources, broken drains, and any gaps in the building's exterior that could serve as an entry point.
This initial sweep is fundamental. Take the case of David in Walthamstow. He kept his kitchen spotless but couldn't understand the scratching sounds he heard at night. During our initial survey, a BuzzKill technician found a broken air brick, almost completely hidden behind a dense pyracantha bush. This was the rat's motorway into his home, a problem no amount of indoor trapping could have solved alone.
Phase 2: Kitchen & Utility Room Check
The kitchen is the number one hotspot for rodent activity inside a home. It offers a reliable supply of food, water from leaky pipes or pet bowls, and numerous dark, warm hiding spots behind appliances. If rats are in your house, you are highly likely to find evidence here.
In this phase, you need to be meticulous. Don't just glance inside cupboards; take items out and inspect the very back. Use your torch to look behind and underneath your fridge, cooker, and washing machine. These are the undisturbed areas where the most obvious rat infestation signs are often found.
- ☐ Search for Droppings: This is the most common and definitive sign. Rat droppings are dark brown, spindle-shaped, and typically 1-2cm long. Check along skirting boards, at the back of cupboards, under the sink, and on top of wall units.
- ☐ Look for Gnaw Marks: Rats must constantly gnaw to wear down their incisors. Look for teeth marks on food packaging, wooden utensils, plastic containers, and the corners of kitchen units or kickboards. Chewed electrical wires are also a major red flag and a serious fire hazard.
- ☐ Identify Smudge or Rub Marks: As rats travel along the same routes repeatedly, the grease and dirt from their fur leave dark smears on surfaces. Check for these marks along skirting boards, on pipes, and around any holes or gaps they might be using.
Done means: You have thoroughly checked all cupboards, drawers, and the areas around and behind every appliance for droppings, gnaw marks, or greasy rub marks.
Finding evidence here can be unsettling, but it gives you clear information to act on. We often see homeowners focus on cleaning visible surfaces while overlooking the hidden signs. A detailed check of these areas, as outlined in our guide on the general signs of rats, is crucial for early detection. Ignoring these signs allows a small problem to escalate quickly.
Phase 3: Loft & Attic Inspection
After the kitchen, the loft is the second most common place to find an established rat problem. It's warm, quiet, and full of soft materials perfect for nesting. Rats can easily climb walls and access the roof space, where they can live and breed completely undisturbed for months.
Safety is paramount for this phase. Ensure your ladder is secure and that you only stand on the wooden joists, not the plasterboard ceiling in between. Move slowly and listen carefully before you start searching. Often, the first sign you'll notice in a quiet loft is the sound of movement.
- ☐ Listen for Noises: Before you start moving around, stand still for a minute and listen. Pay attention to any scratching, scurrying, or grinding sounds. These noises will be most apparent at night but can sometimes be heard during the day if the infestation is large.
- ☐ Find Evidence of Nesting: Rats will shred materials to create warm, sheltered nests. Look for piles of shredded loft insulation, cardboard, paper, or fabrics. These nests are often tucked away in corners, under eaves, or inside stored boxes.
- ☐ Check for Droppings and Urine Stains: As in the kitchen, you'll likely find droppings. In a loft, they may be more concentrated in specific latrine areas. You might also notice a faint but sharp, ammonia-like smell, which is a sign of rat urine.
Done means: You have safely inspected the entire loft space, paying close attention to the corners and eaves, for any sounds, nesting materials, droppings, or distinctive odours.
Discovering a problem in the loft can feel overwhelming, as it's often a sign the rats have been present for some time. However, finding it is the first step toward resolving it. Professional treatment for a loft infestation, like the service we provide at BuzzKill, involves not just removing the rats but also advising on decontamination, as their waste can pose health risks.
Phase 4: Living Areas & Bedrooms
Finding signs of rats in main living areas or bedrooms is less common, but it's a serious indicator that the infestation is well-established and spreading from its primary location in the kitchen or loft. Rats may be seeking new food sources or nesting spots, or the population may have grown too large for its original territory.
Your focus in this phase is on subtle clues that are easy to overlook in day-to-day life. This includes unusual behaviour from pets, who can often detect rodents long before humans can, as well as faint smells or minor damage to furniture and fixtures.
- ☐ Note Unusual Pet Behaviour: If you have a cat or dog, watch them closely. Are they suddenly staring intently at a wall, sniffing under a sofa, or barking at a spot for no apparent reason? Their superior senses of hearing and smell can pinpoint rodent activity inside walls or under floorboards.
- ☐ Look for Damage to Furnishings: While less likely than in the kitchen, rats may gnaw on other materials. Check the legs of wooden furniture, skirting boards, and the corners of upholstered items for small, rough teeth marks.
- ☐ Identify a Persistent Stale Smell: In a room with little ventilation, you might notice a lingering, unpleasant odour. If you can't trace a stale, ammonia-like smell to any other source, it could be indicative of a hidden nest or urine deposits.
Done means: You have checked behind and under furniture in your main living spaces and observed your pets for any unusual behaviour directed at specific areas.
A client, Maria from Ilford, is a perfect example. She kept hearing faint scratching sounds at night but couldn't place them, and her small terrier, Pip, would spend hours sitting and staring at the wall behind the television. During our inspection, we confirmed Pip was right. A thermal camera showed a rat run inside the wall cavity, a problem completely hidden from sight that only a pet's persistence brought to light.
Phase 5: Basements, Cellars & Wall Cavities
Dark, damp, and rarely disturbed, basements and cellars are ideal environments for brown rats. They provide shelter and often have direct access points from the ground or drains. Even if you don't have a cellar, the cavities within your walls can serve as hidden motorways for rats to travel around the house.
This phase involves looking for signs of burrowing and listening for sounds of movement within the very structure of your home. These signs confirm that rats are not just visiting for food but are living within the fabric of the building.
- ☐ Identify Rat Burrows: If you have a cellar or basement with an earth floor, or around the exterior foundations, look for freshly dug holes in the ground, often with a pile of excavated dirt nearby. These burrows are a clear sign that rats are nesting on your property.
- ☐ Listen to the Walls: In the evening, when your home is quiet, place your ear against the walls in areas where you suspect activity. Listen for faint scratching, squeaking, or scurrying sounds coming from within the wall cavity. This is a tell-tale sign of a hidden rat run.
- ☐ Check for Footprints or Tail Marks: In dusty areas of a cellar or basement, you can sometimes find physical tracks. Shine your torch at a low angle across the floor to reveal footprints or the distinctive swipe mark left by a rat's tail.
Done means: You have inspected the property's foundations for any evidence of burrowing and have taken time in the quiet of the evening to listen for sounds of activity within the walls.
Finding evidence here confirms the need for professional intervention. Dealing with rats inside wall cavities requires specialist knowledge and equipment to ensure the problem is fully resolved. Simply blocking a hole can trap them inside, leading to other, more serious problems. Our guide on how to get rid of rats explains the comprehensive approach needed for such situations.
Phase 6: Compiling Evidence & Assessing Risk
You've now completed a full inspection of your property. The final step is to bring all your findings together to understand the full picture. A single sign in one location might be manageable, but multiple signs across different areas point to a more serious issue that requires a professional response.
This phase is about analysis. By mapping out what you've found, you can judge the scale and urgency of the problem. This will help you make an informed decision about what to do next, moving from suspicion to a clear action plan.
- ☐ Map Your Findings on a Floor Plan: Draw a simple sketch of your home's layout. Mark every location where you found a specific sign (e.g., 'D' for droppings, 'N' for nest, 'G' for gnaw marks). This visual map will reveal hotspots and travel routes.
- ☐ Assess the Age of the Signs: Try to determine if the activity is current. Fresh rat droppings are soft and shiny, while older ones are hard, dull, and crumbly. Fresh gnaw marks are light-coloured, while older ones darken over time. Seeing fresh signs confirms an active infestation.
- ☐ Score the Severity of the Problem: Use your map to create a simple risk score. Give yourself 1 point for a single sign in one room, 3 points for multiple signs in one room, and 5 points for finding signs in two or more separate areas of the house (e.g., the kitchen and the loft). A score of 5 or more indicates an established problem that warrants a professional survey.
Done means: You have a clear, documented overview of the extent, location, and recency of the rat activity in your home, allowing you to make a confident decision on the next steps.
This final assessment is crucial. It turns a collection of worrying observations into actionable intelligence. Armed with this information, you can contact a professional pest control service with specific details, which helps them prepare the most effective treatment plan for your situation.
After You Finish
Once your inspection is complete and you've assessed the situation, it's important to act correctly.
- Don't Disturb the Evidence: Leave any droppings or nests you've found untouched for now. A professional technician can use this evidence to confirm the species, gauge the size of the infestation, and determine the best locations for treatment.
- Avoid Blocking Holes Immediately: It's tempting to block any entry points you've found right away. However, if there are rats currently inside, you will trap them in, potentially causing them to die in an inaccessible place or forcing them to gnaw new escape routes into your main living areas. Proofing should always be done after the infestation is cleared.
- Contact a Professional: If you have found clear evidence of an active rat problem, especially in multiple locations, the most effective and lasting solution is to call a certified pest control company. DIY treatments can often fail to address the root cause, leading to a recurring issue.
Complete Checklist (Printable Summary)
Use this table to track your progress and summarise your findings for a clear overview.
| Item | Phase | Owner | Status |
|---|---|---|---|
| Inspect Bins and Compost Heaps | 1. Exterior | Homeowner | ☐ |
| Check Drains and Sewer Grates | 1. Exterior | Homeowner | ☐ |
| Scan for Entry Points | 1. Exterior | Homeowner | ☐ |
| Search for Droppings | 2. Kitchen | Homeowner | ☐ |
| Look for Gnaw Marks | 2. Kitchen | Homeowner | ☐ |
| Identify Smudge Marks | 2. Kitchen | Homeowner | ☐ |
| Listen for Noises | 3. Loft | Homeowner | ☐ |
| Find Evidence of Nesting | 3. Loft | Homeowner | ☐ |
| Note Unusual Pet Behaviour | 4. Living Areas | Homeowner | ☐ |
| Identify Rat Burrows | 5. Basements | Homeowner | ☐ |
| Map Your Findings | 6. Assessment | Homeowner | ☐ |
| Assess the Age of Signs | 6. Assessment | Homeowner | ☐ |
If this checklist has confirmed your fears, please don't worry. Identifying the problem is the most important step, and our team at BuzzKill Pest Control is here to help you resolve it quickly and safely. We understand how stressful this situation is, and we prioritise a fast, reassuring, and effective service for homeowners across East London and Essex.
When you call us, an experienced member of our team will listen to your findings and can often arrange a same-day inspection. One of our RSPH Level 2 qualified technicians will visit your property to conduct a thorough professional survey, confirming the extent of the issue and identifying all entry points. They will then walk you through a clear, no-obligation treatment plan tailored to your home, with a focus on the safety of your children and pets. All our work is fully guaranteed, giving you peace of mind that the problem will be solved for good.
The droppings, gnaw marks, and other evidence you've documented are definitive rat infestation signs that require expert attention. Our trained technicians can interpret these findings to accurately assess the size and scope of the problem, identifying vulnerabilities a homeowner might miss. Acting on these signs is the most important next step. To discuss your findings and book a same-day inspection for a guaranteed solution, call us on 0203 468 1999 or request a callback now.
Frequently Asked Questions
What do rat droppings look like compared to mouse droppings? Rat droppings are significantly larger than those of mice. A brown rat's droppings are typically 1-2cm long and spindle-shaped, resembling a large grain of rice. Mouse droppings are much smaller, around 3-6mm, and are more pointed and granular. If you're unsure, our guide to the signs of mice can help you differentiate.
Can you just have one rat in your house? It's possible, but highly unlikely. Rats are social animals that live in groups. If you see one rat or find fresh signs of activity, it's almost certain there are more hidden nearby. A single rat is usually a scout from a larger colony looking for new sources of food and shelter.
How do I know for sure when the rats are gone? The most reliable way to know an infestation is gone is the complete absence of any new signs for several weeks. This means no new droppings, no fresh gnaw marks, and no more sounds at night. A professional pest controller will often leave non-toxic monitoring bait to check for any remaining activity after a treatment is complete.
Are rats a serious fire hazard? Yes, they are. Rats have constantly growing incisor teeth and a compulsive need to gnaw to keep them worn down. They frequently chew on the plastic casing of electrical wires and cables, exposing the live copper wire. This creates a very real risk of a short circuit, which can lead to a house fire.
How quickly can a rat problem get out of control? Very quickly. A female rat can have up to six litters a year, with each litter containing 5 to 12 pups. These pups reach sexual maturity in just a few months. This means a single pair of rats can theoretically lead to over 1,000 descendants within a year under ideal conditions, which is why addressing the first rat infestation signs promptly is so critical.
Related Blog Posts
Need professional help? BuzzKill offers fast, reliable pest control services across London and Essex.